
Getting Started with Star Trails
Paint the sky
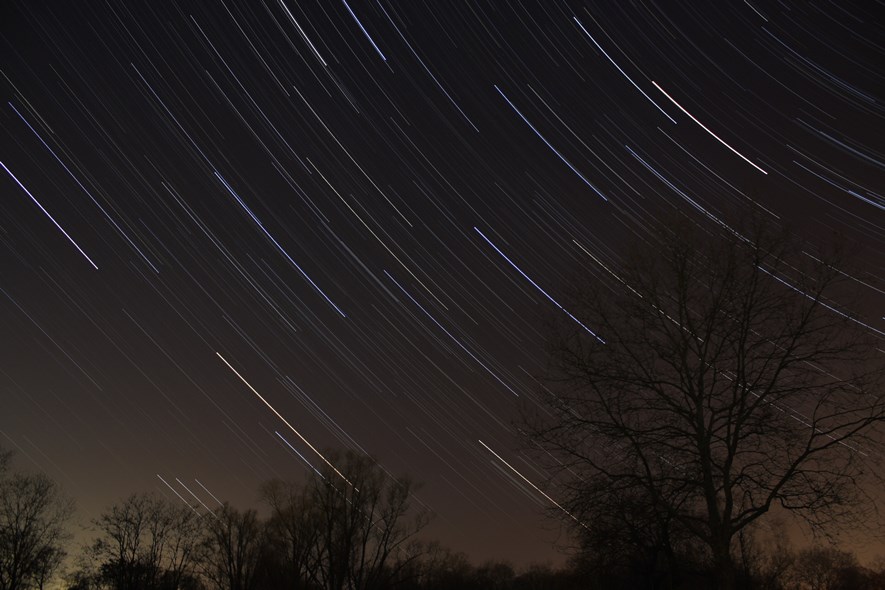
I just recently started experimenting with star trails photography. The "classic" technique is to make one single exposure (say, for one hour), and as the earth rotates, the stars will paint beautiful trails on the sensor/film. Now, this may not work for everyone. A one hour exposure would require the surrounding to be pitch black. I live in the city, and along with that comes a lot of light pollution. So instead of doing it the real way, I had to resort to some cheating. The idea is quite simple: Have the camera take a series of pictures of the clear night sky, then merge them in the computer. Read on for more.
What you need
Now, I have only tried this with my DSLR, but I guess it would be possible using a compact as well. With a DSLR, you will typically need:
- A tripod
- A remote shutter release (don't have one? There actually more useful than you might think.)
- A clear night sky and some patience.
Setting it up
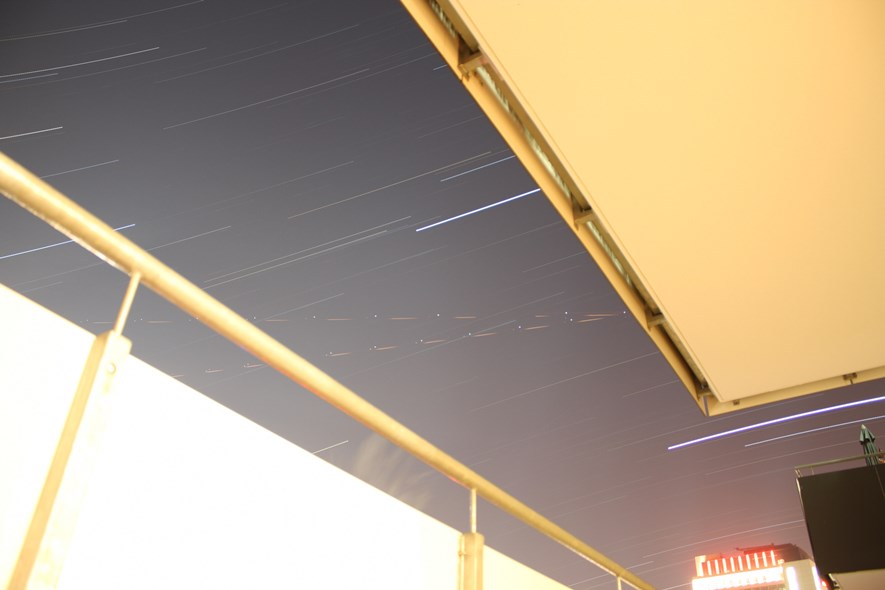
I set the camera up on my balcony as a first test. This is the basic procedure:
- Set the lens focus to infinity. This may be a bit tricky, especially with lenses like the Canon kit lens, where nothing on the lens actually indicates distance. Try focusing on something far away, adjust manually if needed.
- Switch off auto focus and optical image stabilizer.
- Set the drive mode to "Continuous", making sure that a series of pictures will be taken.
- Switch to manual mode. This may need some experimenting. I opened up the aperture fully, set ISO to 400 and shutter speed to 30 seconds.
- Mount the camera on the tripod, use the shutter release to take a test shot. If the stars look clear and sharp, you are good to go.
- Lock the shutter release (making the camera shoot pictures continuously) and wait for an hour or so.
Ok, so you waited for one hour, and now you are back inside. Time to merge the images. I used Star Trails, a very useful (and free) piece of software. Just add all the images and the application will merge them for you. The result is shown below.
Time to get to the countryside and take some real pictures! Now, while waiting out there, alone and in the dark, looking at the night sky, why not listen to some music? Minimalistic space ambient fits perfectly, so let me recommend The Sol System mixes from Alex Hephaestion.
2 Comments
Subscribe to new comments by RSS