Self-hosting your website on a Raspberry Pi Zero
Because you can
If you pay a visit now and then to Hacker News, you might have noticed that two topics that keep coming up are the old web, and self hosting. The old web, because the web used to be better than today, and self hosting, because individuals have too little control, and the big corporations too much, and we can change that balance by hosting our content ourselves. Whether true or not, self hosting your own website is usually pretty easy can be a fun exercise to setup and run. Let's dive in.
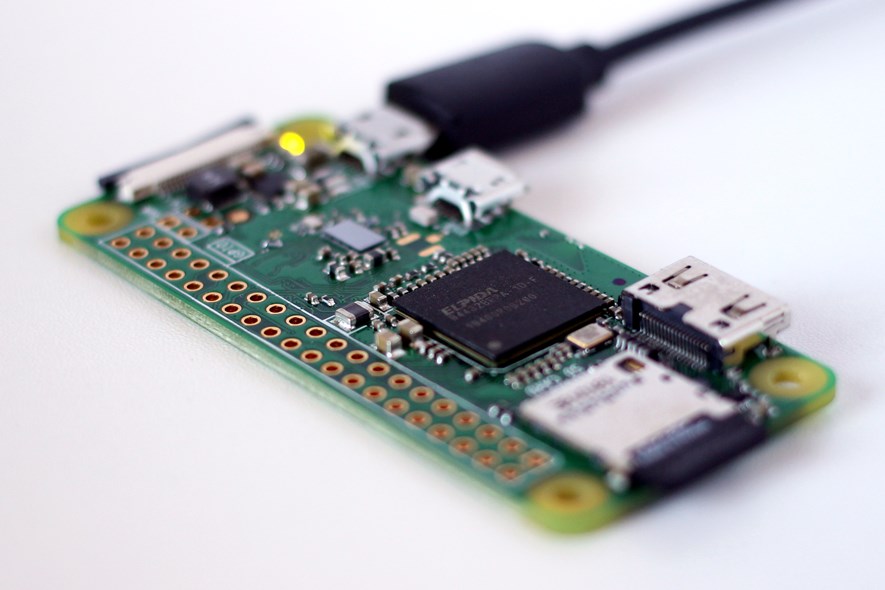
In this guide, we will use a Raspberry Pi Zero W as our web server. Now, you could follow this guide and use practically any Raspberry Pi, or other computer for that matter, as long as it runs Linux. Since we assume the Pi Zero W though, we will install the operating system without a graphical user interface (since it's too slow for that in my opinion) and we will also be using WiFi to connect to the network as it's WiFi capable, and has no Ethernet port.
The flavor of Linux we will be using is Raspberry Pi OS, formerly known as Raspbian, which is based on Debian.
1. Install Raspberry Pi OS
Before we start, we need to prepare an SD card with the operating system. If you already own a Raspberry Pi, you probably have performed this step already. If not, the easiest way is to download Raspberry Pi Imager from here.
Simply download and follow the on-screen instructions. For our purposes, we only need the headless version (AKA lite version, i.e. the OS without a graphical user interface).
After the SD has been prepared, insert the card into the Raspberry Pi and connect it to a power source and it should boot up.
2. Initial setup
Once the OS has booted, you will be asked to pick a keyboard layout, a username, and a password. Make sure to pick a strong password because this box will be exposed on the web.
Then, type this command to enter setup:
sudo raspi-config
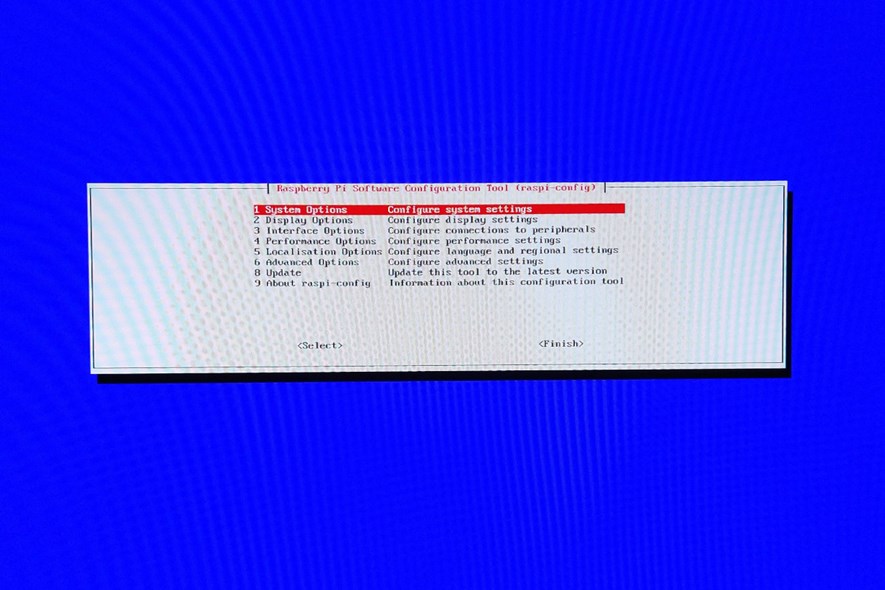
We want to do a few things here: Connect to the network, enable SSH, and set the host name.
- Connect to the network: Go to System settings => Wireless LAN
- Enable SSH: Go to Interface options => SSH => Confirm with "Yes"
- Set network host name: Go to System options => Hostname => Enter a name. I used the host name "blueberrypie", which I will be referring to later.
Finish and reboot.
To test if the internet connection works, you can run this command:
ping -c 3 google.com
This will send ping requests to google.com and stop after 3 times. If you get some text output including "3 packets transmitted, 3 received", then all is fine. In my case, this did not work at first, turned out I used the wrong WiFi settings. Oops.
If it works - congratulations! The Pi is now available on the network and can access the internet.
3. Keeping the system up to date
This is not strictly necessary to get the web server working, but it might be the step that you skip and then regret later!
Making sure the OS has all the latest security updates can be quite important, especially since it will be exposed on the internet. To make sure to keep the OS up to date, we can enable unattended upgrades with this command:
sudo apt install unattended-upgrades
The default configuration should be fine most of the time, looking for updates daily. Note, however, that automatic updates may potentially cause problems if a new version of a package you depend on has breaking changes. Still, I think this risk is worth taking, since you make sure security updates are automatically installed without any effort on your side.
Otherwise, you can also update the packages manually in the system by using:
sudo apt update

sudo apt upgrade
Sooner or later, you might want to move to a newer version of the OS itself, typically when it is approaching end of life. You cna find information on the Debian Releases page
In order to update to a new major version of the OS, follow these steps:
First, we update the system:
sudo apt update

sudo apt dist-upgrade
Then we specify the release to use by editing sources.list:
sudo nano /etc/apt/sources.list
Find this line and change "bullseye" to the name of the latest release (refer to link above, or the Raspberry Pi OS page):
deb http://raspbian.raspberrypi.org/raspbian/ bullseye main contrib non-free rpi
Then we run a series of commands to perform the upgrade and reboot:
sudo apt update

sudo apt dist-upgrade

sudo apt autoclean

sudo reboot
4. Access the Pi from another computer
Since this will not be a computer we will typically keep a keyboard and monitor connected to, we will instead manage it using SSH, which you can think of as a command line that can be run from another computer on the network.
Since we enabled SSH previously, it should just work at this stage. So assuming your "other computer on the network" is running Windows, you can access it either using the well-known SSH client PuTTY, or you can use the
ssh yourusername@hostname
Where "yourusername" and "hostname" are the values you entered during during initial setup. You will be asked to accept the fingerprint of the server, and then asked for the password of the user you entered. After entering the password, you can run commands (such as
5. Install Apache
There are obviously other web servers, nginx being a very popular option, but in this guide we will stick to the good ol' Apache.
In order to install Apache, run these commands:
sudo apt-get update
sudo apt-get upgrade
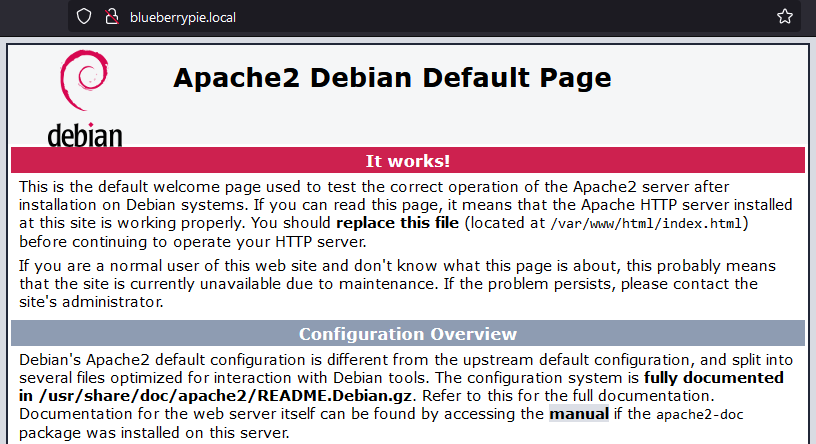
sudo apt install apache2
To test the installation, open a web browser on a PC on the same network and enter the hostname of the Raspberry Pi we entered previously, followed by ".local", so in my case: "http://blueberrypie.local". We are greeted by the default Apache web page:
6. Prepare upload via SFTP
Typically, we want to develop the website on another computer, and then upload to the web server. In order to do that, we need to enable writing to the folder
To be able to make changes to the files within the directory we will set up some permissions. We set the current user as the owner of the folder with the
sudo chown yourusername /var/www/html
Make sure to replace "yourusername" with your actual username.
Now, on the computer that will be uploading the files, install an SFTP client. We will be using FileZilla. Download, install and run, and then enter the host name and the user name. Also make sure "SFTP - SSH File Transfer Protocol" is selected.
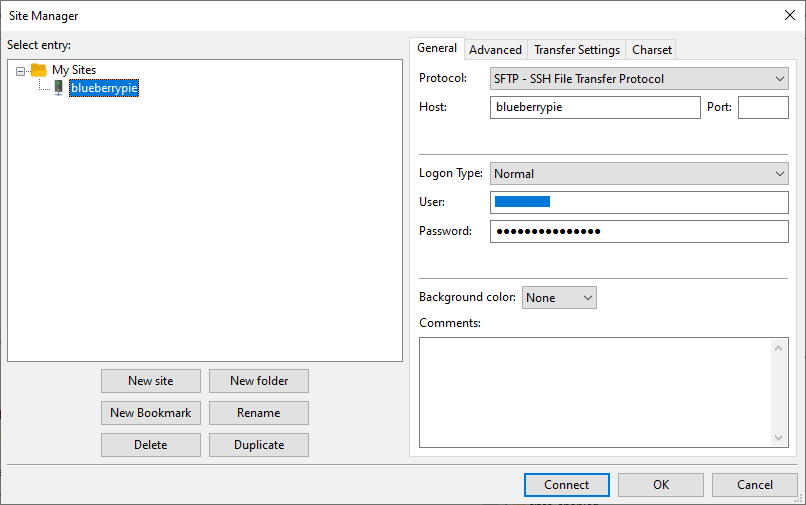
After connecting, navigate to
7. Set up a static HTML page
You can now write some content before we start making the page available to the world. If you don't have any content at the moment, feel free to use this (satire?) page which promotes the idea of self-hosting and that should fit right in among other self-hosting (or "take back control") blog posts regularly posted on Hacker News.
When it comes to the technology of the website itself, you have many options. I will not elaborate on these further here, but here are a few suggestions:
- A single static hand-crafted HTML page
- A collection of HTML pages generated by a static site generator
- A collection of sort-of static HTML pages using server side includes (SSI)
- "Proper" server side handling using PHP (although heavy PHP processing is a bit slow on the Raspberry Pi Zero)
- A single page application using a framework such as react (if you like NPM packages and security warnings)
- A single page application using only vanilla JavaScript
All of these are possible, but some, such as enabling PHP, require installing additional modules and configuring Apache.
8. Port forwarding
In order for the web server to be accessible from outside the network, we need to forward some ports from the router to the Raspberry Pi. The required ports are 80 (HTTP) and 443 (HTTPS). How to set this up varies on your router, but typically you would log on to the router, open WAN settings (or similar), and then look for port forwarding. You will need to forward port 80 and 443 to the Pi. You might be able to use the name of the Pi (in my case, "blueberrypie"), but if you need to enter the IP, you can find it by using this terminal command:
hostname -I
9. Setup Dynamic DNS (DDNS)
Since we are setting this up on a home network without a fixed IP, we need to setup dynamic DNS (DDNS) to make sure the page is accessible if our external IP changes. Using DDNS is often an option in the router. For example, this can be enabled on an Asus router by logging on to the router and navigating to WAN => DDNS. The URL can be setup so it can be reached from (yourname).asuscomm.com
Once you have completed this step, you will be able to open a web browser and enter the URL you provided above, and the page should open. It should also work from any device, even from outside the network (try using your phone after switching off WiFi on it). But since we use HTTP, we get a warning indicating that the connection is not secure. We will take care of that in the last step.
10. Install TLS
TLS (AKA SSL, or secure connection) is not strictly necessary, but using it had become a de-facto standard. Plus, it's free and easy! With Let's Encrypt, we can get at free certificate and setup automatical renewal to save us from the headaches of expiring certificates.
We simply run two commands to get it working. The first one will be installing Certbot, which will basically do all the work for us. The second command will tell Certbot to get a certificate and install it on Apache.
sudo apt-get install python3-certbot-apache

sudo certbot --apache
It will ask for an email address (used for urgent renewal and security notices) and the URL that we set up in the previous step.
Once finished, open the URL in the browser again. It should now automatically redirect to HTTPS and display that the connection is secure.
But why?
Why go through all the trouble of self-hosting? There are, after all, several other options, usually less complicated, and sometimes even free. I guess we could list some pros and cons of self-hosting.
Pros
- It's a fun exercise and you might learn something
- If you happen to have an old Raspberry Pi kicking around, it's basically free
- It's completely yours and you are free to do whatever you want with it
Cons
- It's a bit complicated to get it running
- It's even more complicated to keep it running. The page could go down for a number of reasons: Your internet connection goes down, you restart your router, you reboot the Pi, etc.
- You are making the server, and in extension, other devices on the network, open for hacker attacks
- The server is using power - granted, not much if it's a Raspberry Pi Zero
- The server is rather slow and may not be able to handle too much traffic - granted, you could use something faster than a Raspberry Pi Zero, but then you will be using more power
- You will have another device to manage and keep up to date with security updates and whatnot
All in all, it's not something I would recommend in a professional capacity, but definitely something I would recommend as a fun side project.
Update: I found that sometimes after a reboot, the Apache web server would fail to start. While investigating the issue, I accidentally broke off the mini HDMI connector from the Raspberry Pi Zero - oops! I set up a Raspberry Pi 3B instead by using my own instructions above and it went smoothly - also the Apache web server problem is gone and performance is generally better. Not what I had in mind but if it works, it works.

1 Comment
Subscribe to new comments by RSS