Close search results
The end result. You can tell that some post processing effects are missing, but I still think it looks impressive.

Create Unity3D Skybox with Space Engine

Aim for the stars

Unity3D allows you to combine 6 images to create a skybox to use in your game. Sounds good at first - but how can you create such images to begin with? Turns out the excellent Space Engine is able to export the current scene as a skybox, letting us capture stunning views of galaxies, planets, and everything else out there to use in our game. While some post processing effects are missing, it's easy and still looks great! Continue reading if your game needs a little splash of the final frontier.

Introduction

Space Engine might be one of the coolest programs ever made. It uses procedural generation to simulate a virtual planetarium, letting you just hang around in our solar system, or explore far away galaxies unknown to man. If you haven't tried Space Engine yet, stop reading now, get it from here, play around with it and come back in a few hours after marvelling at the vastness of the universe. And while doing so, see if you can find any interesting views to use in your game.

Note: In this tutorial, I will be using the older but free version 0.9.8.0 of Space Engine.

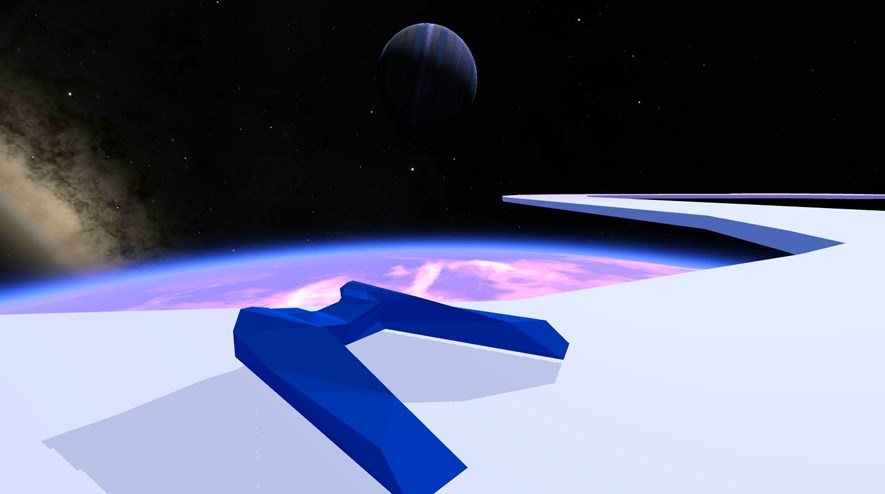
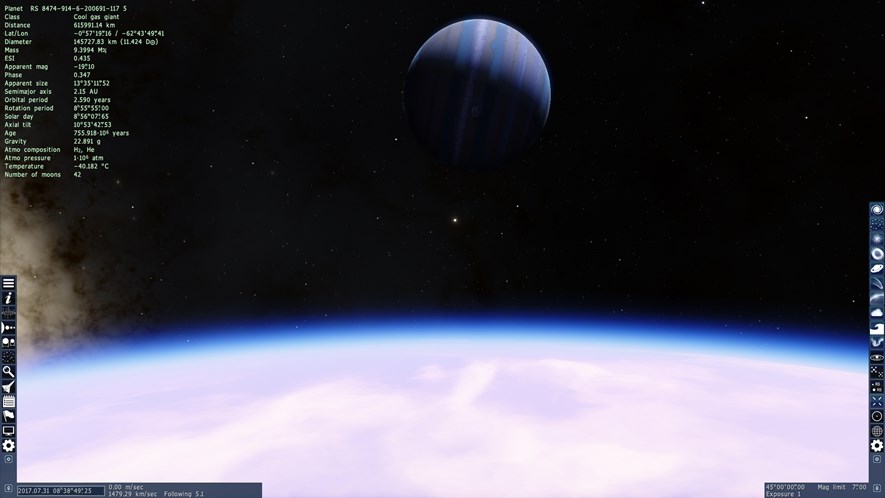
Step 1: Find a view in Space Engine and export it

A view of the planet RS 8474-914-6-200694-117 5 from one of its moons. Looks pretty neat, so we will use it in our game.

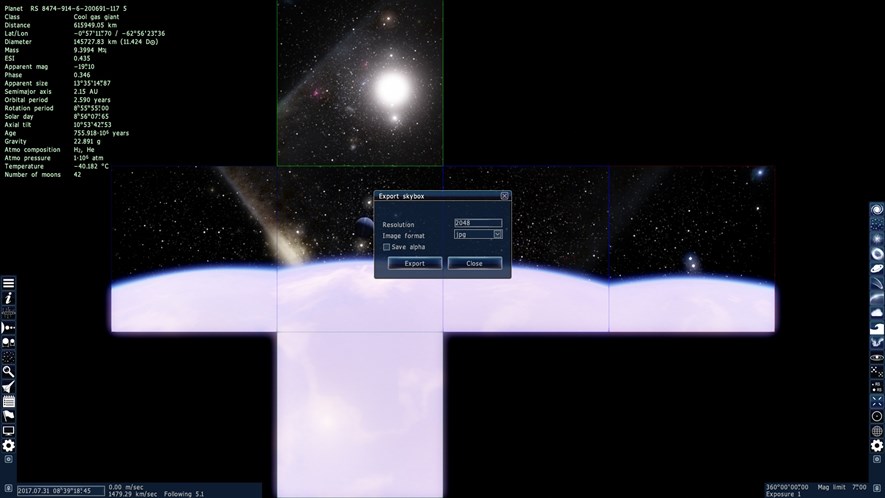
Now, press ESC, select "Editor" and then "Export Skybox".

From here, we can set up the resolution and image format. I will go with JPG and 2048px resolution.
The files will be written to the Export folder in the SpaceEngine folder. Note that the files will be overwritten if you export again.

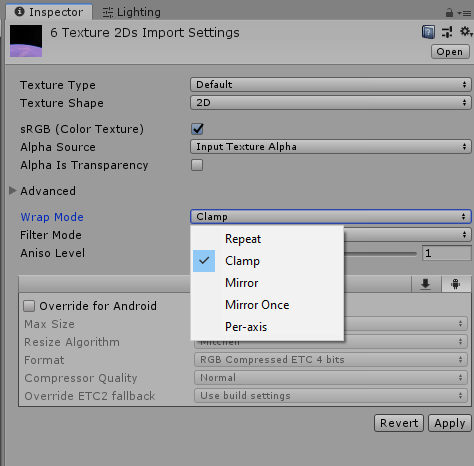
Step 2: Import the skybox into Unity3D and set the wrap mode

In the Project tree, create a new folder called Skybox and add the images.
Select all images and set the wrap mode to Clamp or you might experience gaps between the textures.

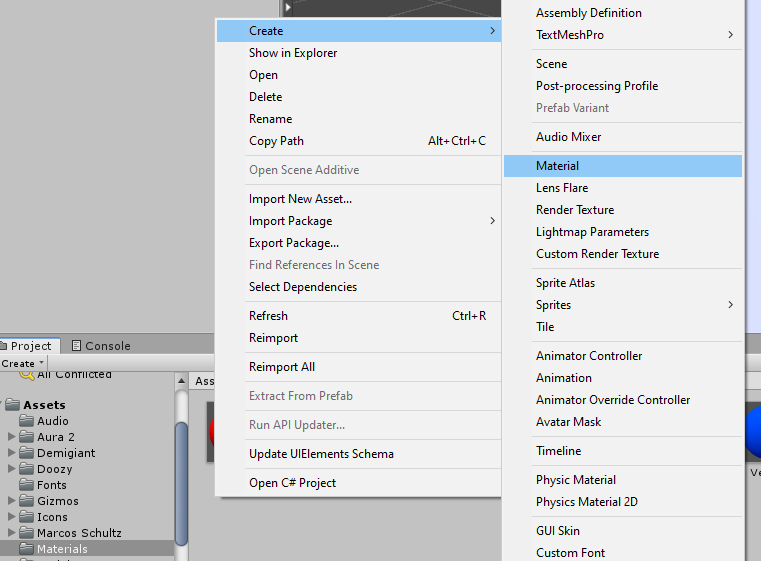
Step 3: Create a material and select the images

Create a new material and call it
Create a new material and call it "space".
Select the shader
Select the shader "Skybox/6 Sided" and assign each image.

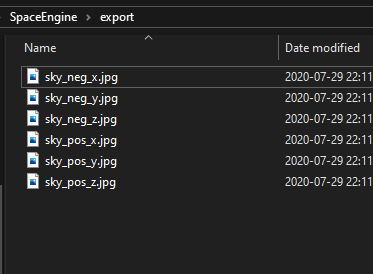
If you are unsure how to map the exported images, they should be set as following:

  • Front (+Z): sky_pos_z.jpg
  • Back (-Z): sky_neg_z.jpg
  • Left (+X): sky_pos_x.jpg
  • Right (-X): sky_neg_x.jpg
  • Up (+Y): sky_pos_y.jpg
  • Down (-Y): sky_neg_y.jpg

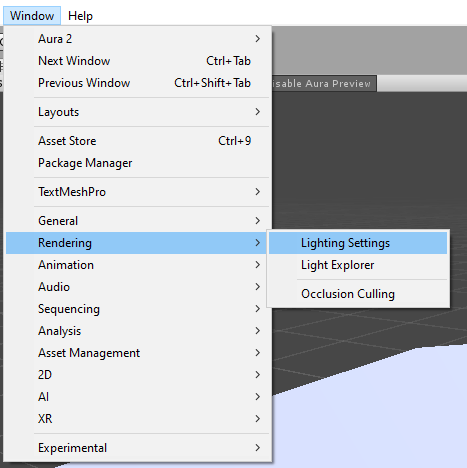
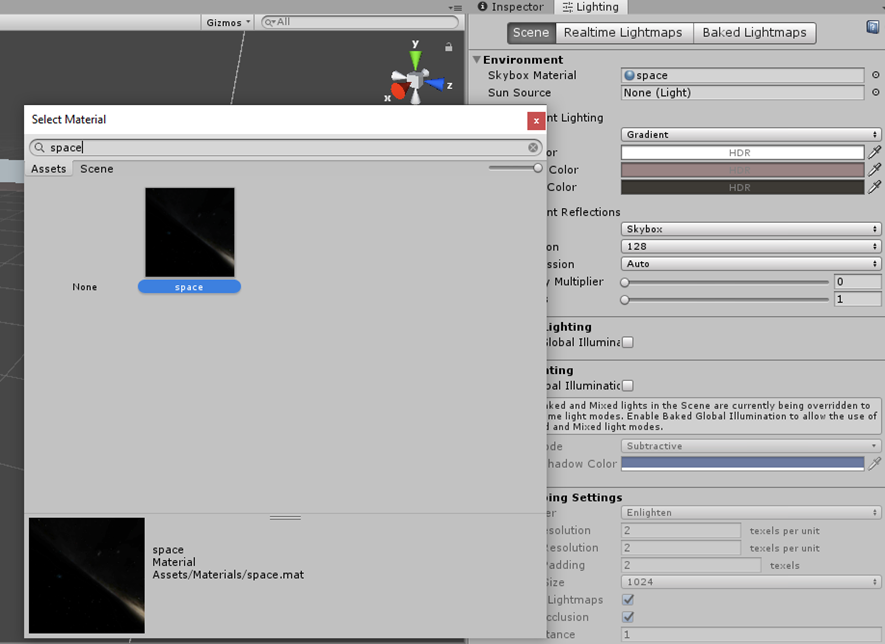
Step 4: Set the skybox

Open the lighting settings window.
From here, set the Skybox Material to our new material that we called
From here, set the Skybox Material to our new material that we called "space".
The end result. You can tell that some post processing effects are missing, but I still think it looks impressive.

Leave a comment


This will just take a second.

Submitting your comment...
Page Theme: Dark / Light
Erik Moberg  2024