Vignetting with the Gimp
Defective by design
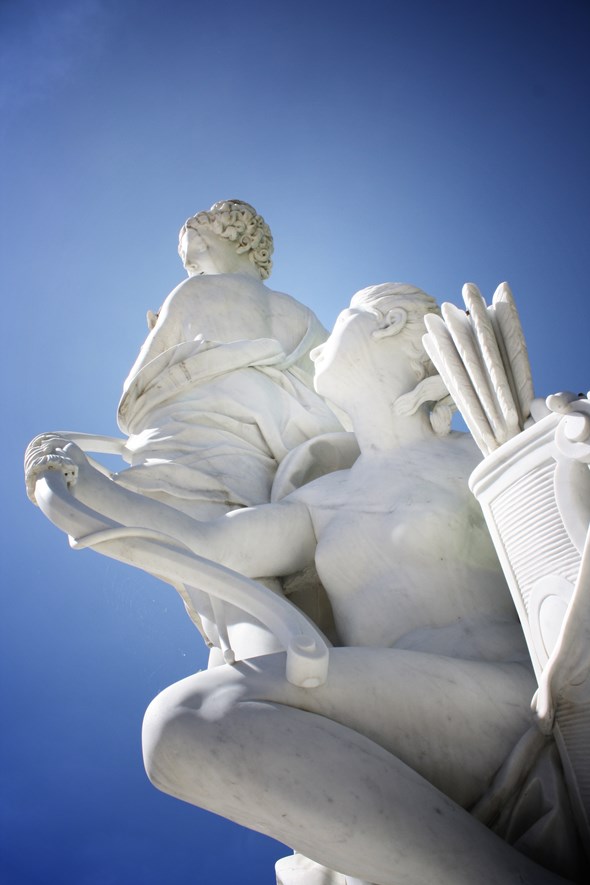
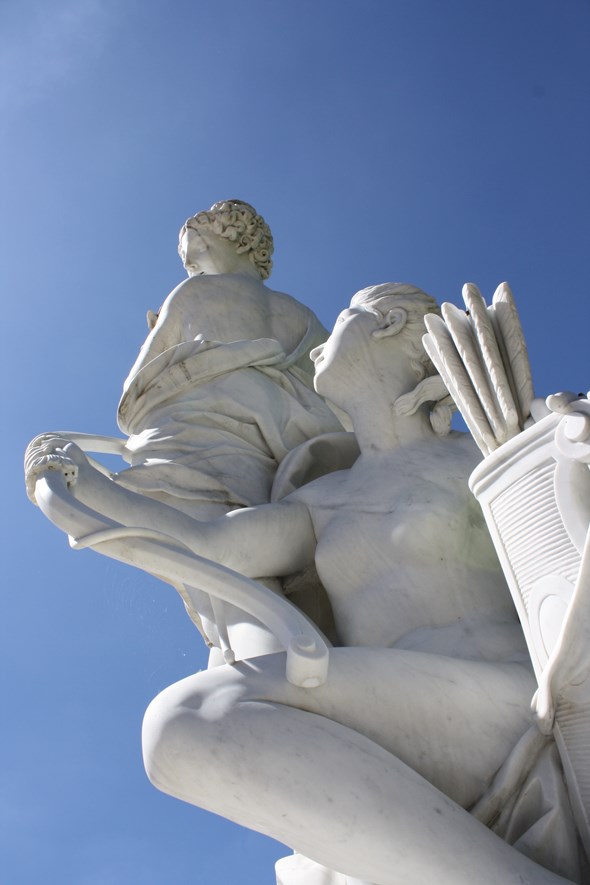
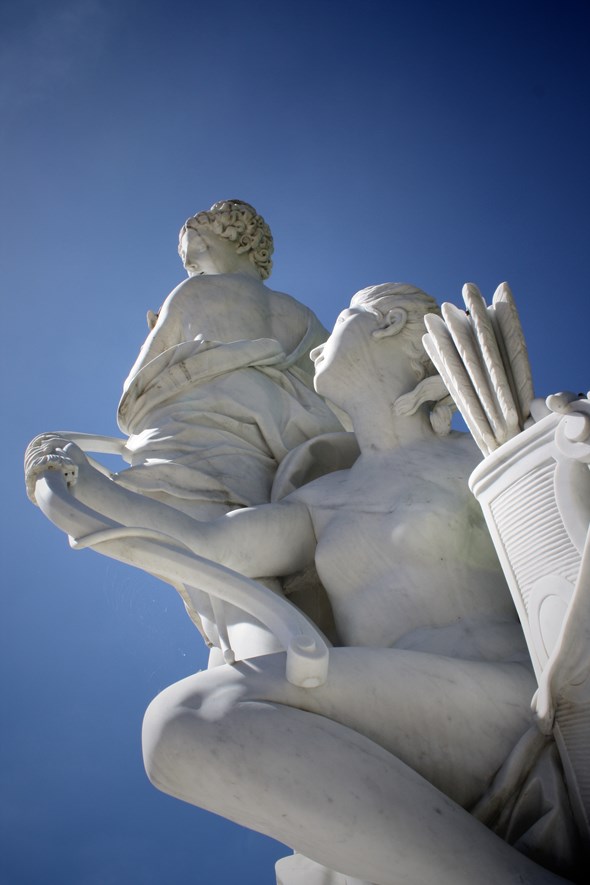
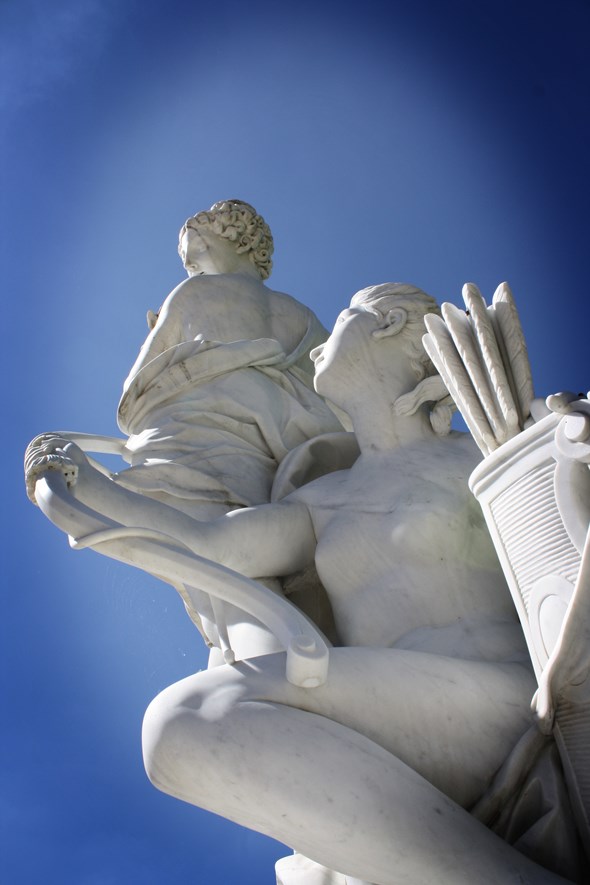
Dark corners in a photo are usually referred to as vignetting. Actually a lens defect, it does leave a lot of room for creativity. Portrait shots, for example, can benefit from some vignetting since the dark corners emphasize the subject in the middle. It also adds a nice vintage effect and often works well on black and white photos.
In Adobe Lightroom, there is built-in functionality for adding vignette. But what about Gimp? Turns out there are several ways to do it. Read on.
Subtlety is key
When creating a vignetting effect, adding too much happens easily. In this tutorial, I exaggerate the effect some (actually, quite a lot), to make the different results of the methods more clear. A good vignette should just barely be visible.

Method 1: Interesting but fake
This is the simplest way and produces interesting results. The basic idea is to create a new layer on top of the image containing a radial fill, and overlaying the layer on the image. These are the steps:
- In the toolbox, set the foreground color to white and the background color to black.
- From the Layers dialog, add a new layer (Ctrl+Shift+N). (Fill type doesn't matter.)
- In the layers dialog, set the Mode to Overlay.
- Click the Blend (Gradient) Tool in the Toolbox.
- In the tool options dialog, set the shape to radial.
- Make a gradient by clicking and dragging from the middle of the image to any of the corners.
- Adjust the layer opacity as needed.

Tip #1: If you want to create an even stronger effect, just duplicate the new layer.
Tip #2: In the tool options, select a gradient that goes from transparent to black instead of white to transparent (with some offset, as described below) to avoid brightening the center.
Method 2: More natural
Here, a copy of the image is created and put on top. It's center is removed using a layer mask and the corners are darkened using the Levels tool.
- In the toolbox, set the foreground color to black and the background color to white (ie opposite to method 1).
- Using the layer dialog, select the background and duplicate it (Ctrl+Shift+D).
- Right-click the new layer and select Add Layer Mask (fill color doesn't matter).
- Click the Blend (Gradient) Tool in the Toolbox.
- In the tool options dialog, set the shape to radial.
- Still in the tool options dialog, increase the Offset some. (I set it to around 30.) This will prevent the gradient from fading from the start.
- Make sure the layer mask is selected, and drag the gradient from the center to any of the corners.
- In the layers dialog, right click the layer and deselect Edit Layer Mask.
- Under the Colors menu (main image window), select Levels. Drag the left triangle (arrow) closer to the center to darken the corners.

Tip: Experiment with tools other than the Levels dialog to darken the image for a different effect.
Method 3: More control (maybe)
By adding a layer and applying a blurred layer mask, we create a dark, round, fuzzy black border which is put on top of the original image.
- In the toolbox, set the foreground color to black and the background color to white.
- From the Layers dialog, add a new layer (Ctrl+Shift+N). Set Fill Type to foreground color.
- Set the Mode to Overlay.
- Right-click the new layer and select Add Layer Mask.
- Initialize the Layer Mask to White (full opacity).
- With the layer mask selected, use the Ellipse select tool to select the "interesting" part of the image - ie the part that will remain unaffected.
- Use the Bucket fill tool to fill the selection.
- Press Shift+Ctrl+A to get rid of the selection.
- Go to Filters -> Blur -> Gaussian Blur. Set radius (both x and y) to a high value (I used around 500 pixels for a 2592x3888 pixels image, should give you a rough idea) and click Ok.
- Adjust the layer opacity as needed.

Tip: By using the Free select tool instead of the Ellipse select tool, you can customize the shape of the vignette.
Winner?
Method 2 is quite straightforward and produces good results. Method 1 creates a "cheap lens" effect (much thanks to the increase in brightness in the center), which could look cool applied to some shots, while it could completely ruin others. As for method 3, it feels a bit cumbersome, and adding that Gaussian blur is also slow. YMMV.
Conclusion
And again it has been proven that everything can be done with Gimp. ;)
By the way, the methods above could also be used to do away with vignetting by brightening the corners instead of darkening them (for example, by just inverting the layer mask used in method 3).
Anyway, hope this helps someone. Happy Gimping!
3 Comments
Subscribe to new comments by RSS